

Celebrate common ties by tackling this Father’s Day project with dad
May 29, 2018
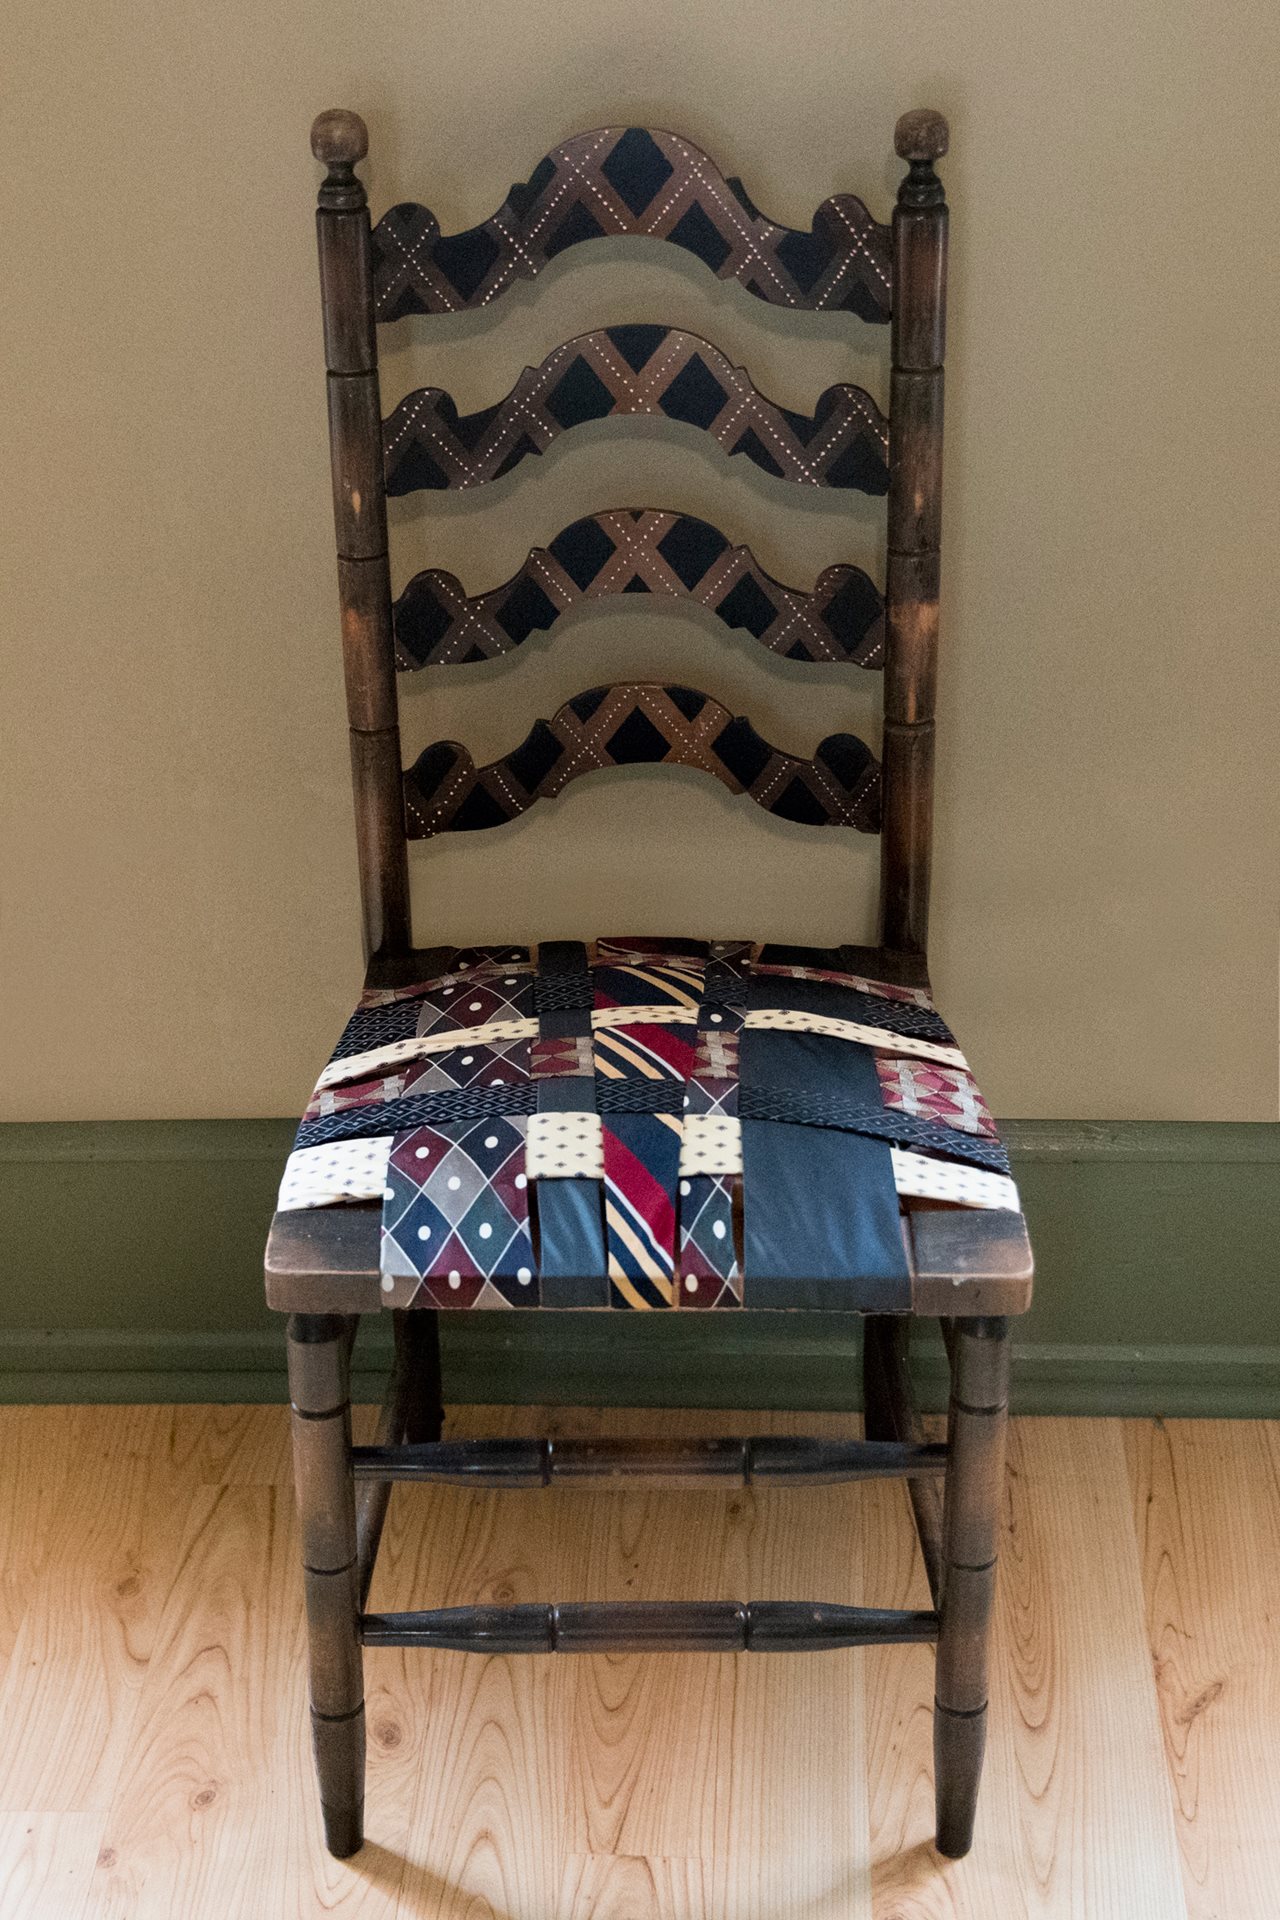
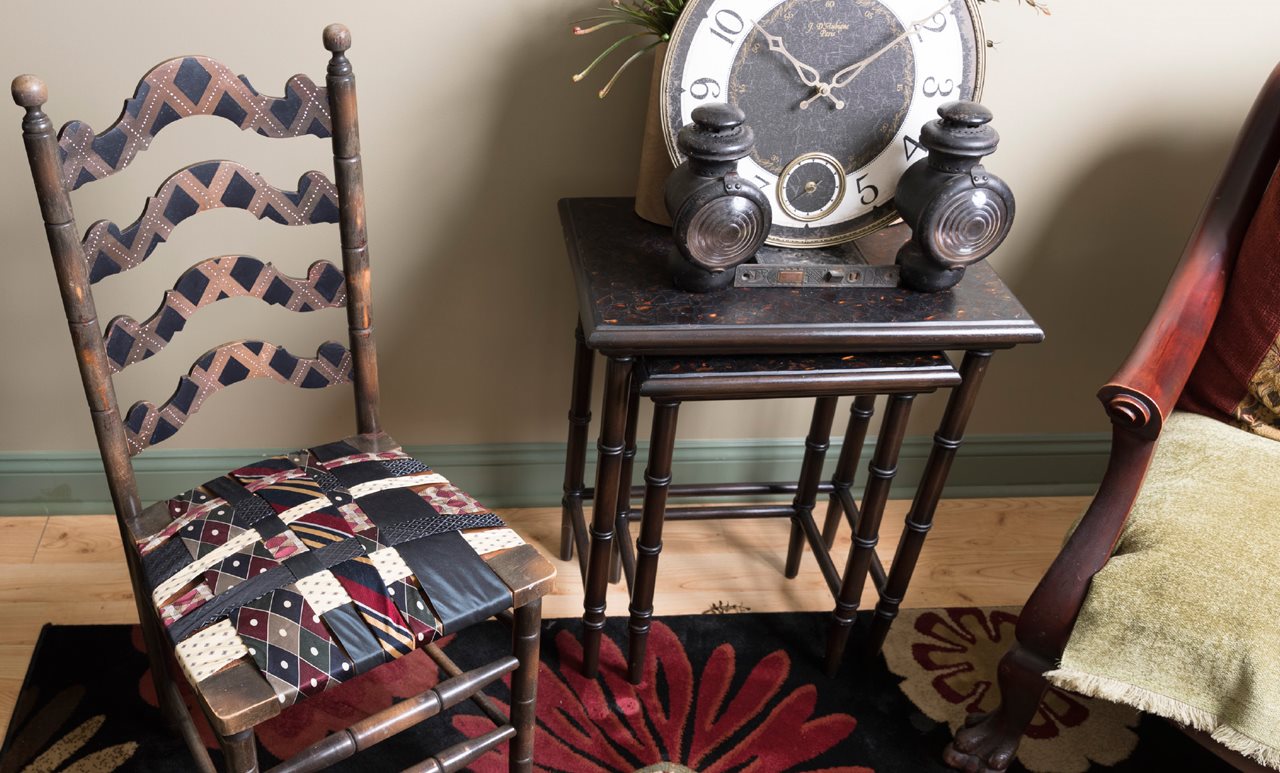
(BPT) – With Father’s Day right around the corner, now is the perfect time to tackle a new project with your dad, one you both can enjoy. This cane seat chair re-covered with ties is made from a simple design so anyone can finish it regardless of skill level. When you’re done, you’ll have a lasting memento of your work together that you can enjoy seated or standing. And, the tools used in this project, as well as other DIY staple guns, nailers and hammer tackers, are great and practical gifts for the special person in your life this Father’s Day.
Before you begin: Assemble your tools
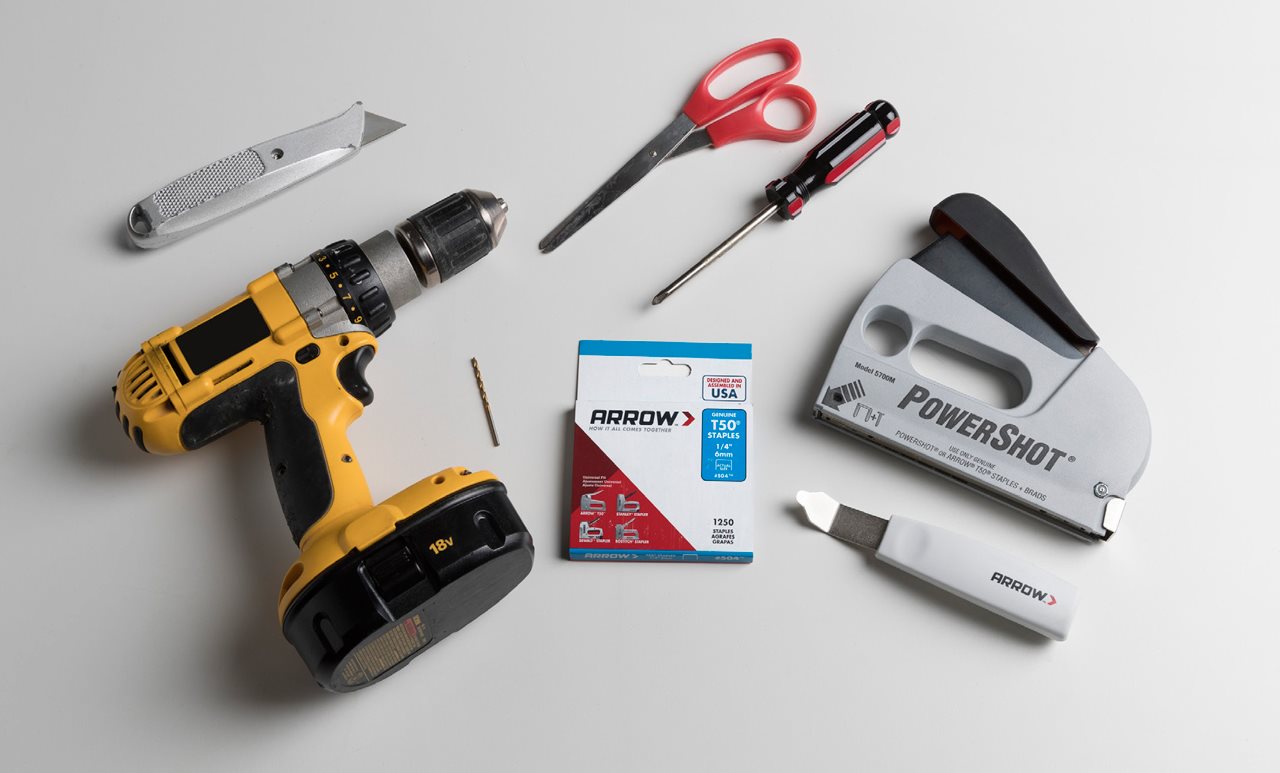
The Arrow 5700 PowerShot Forward Action Staple Gun and Nailer, along with Arrow T50 Staples, will be integral parts of your project. In addition to these tools you’ll need a drill and drill bits, screwdriver, utility knife, fabric scissors, foam padding, plywood backing, 8-12 screws and enough ties to cover the frame and length of the seat.
Step 1: Remove and re-cover
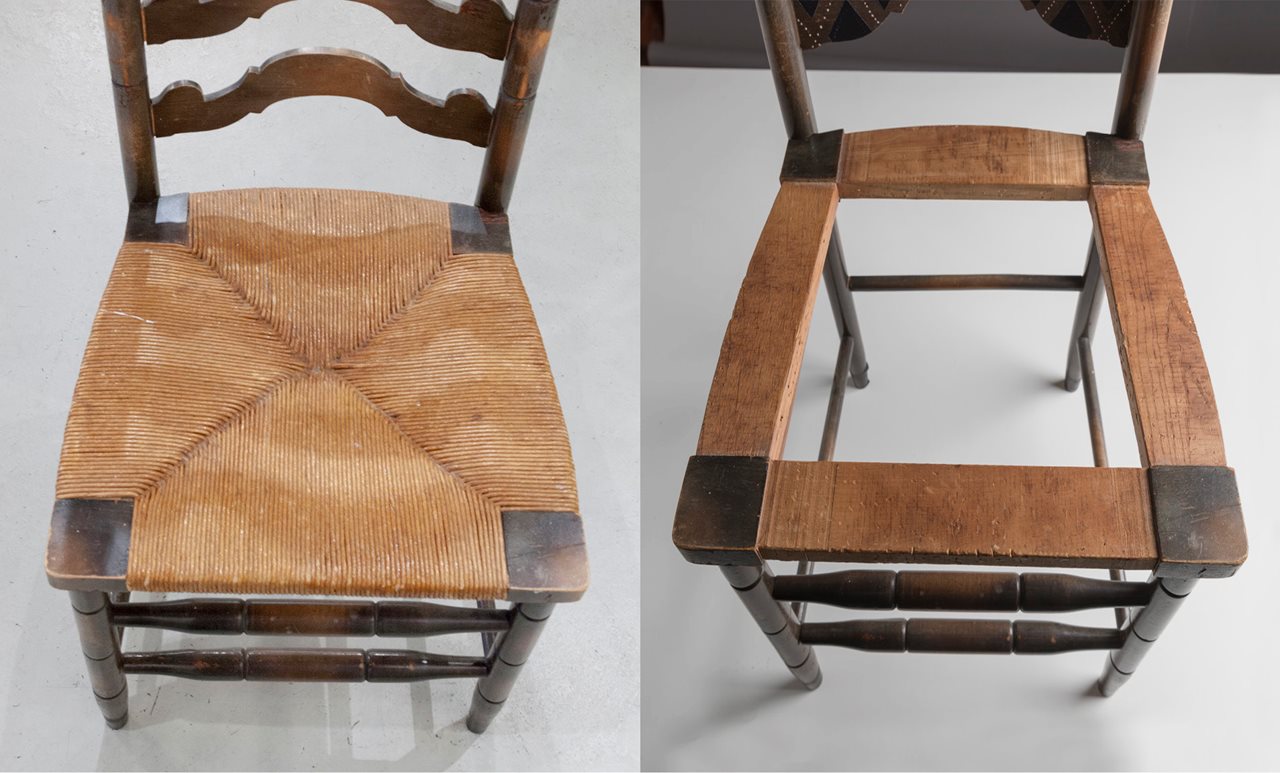
Remove the cane seat and any jagged fragments from the seat frame in preparation to re-cover. Turn the hand-woven cane chair upside down and cut the connecting cane pieces. Pull all the strands from the chair.
Step 2: Set and secure the ties
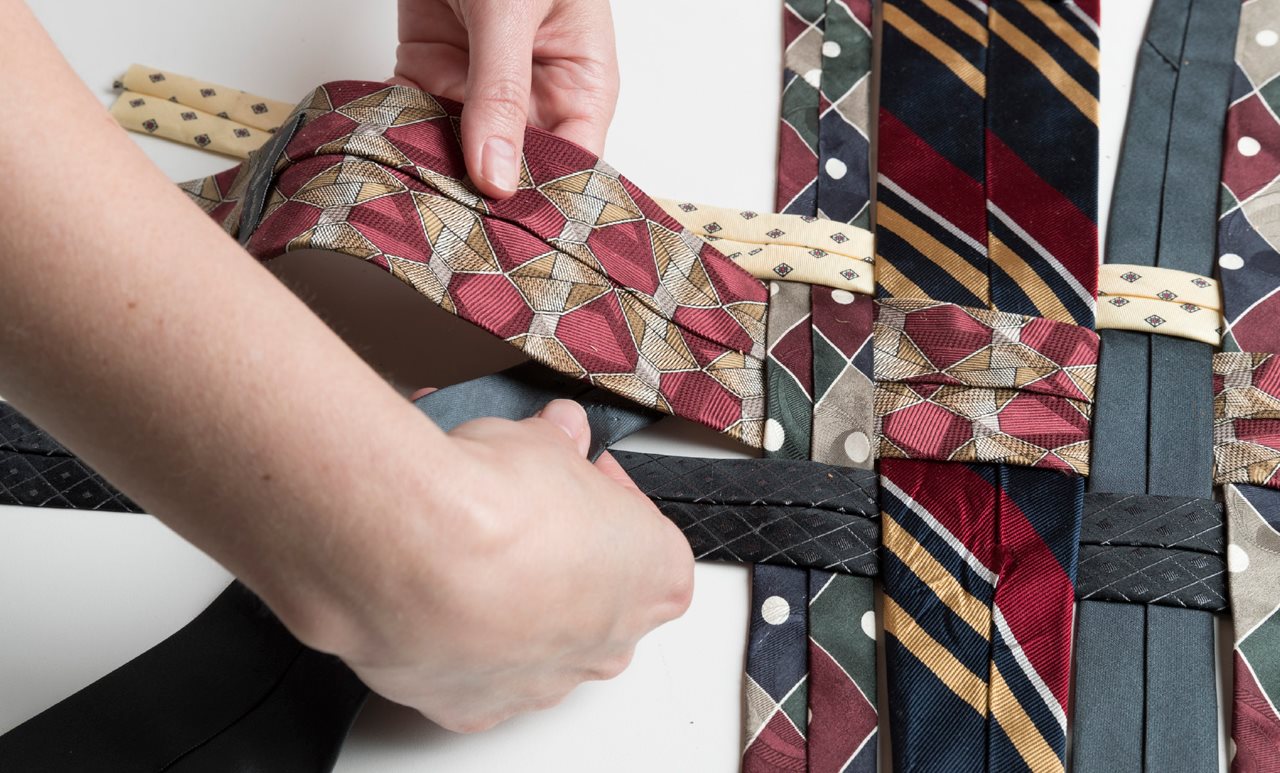
Arrange the ties on a flat surface with the same number of ties going vertically and horizontally to cover the width and length of the seat area. It may be helpful to use masking tape to secure the ends of the vertical ties to the flat surface so they are secure. Now weave the horizontal ties in an over-under pattern until you have created a woven pattern over the entire surface area of the seat.
Step 3: Staple the seat
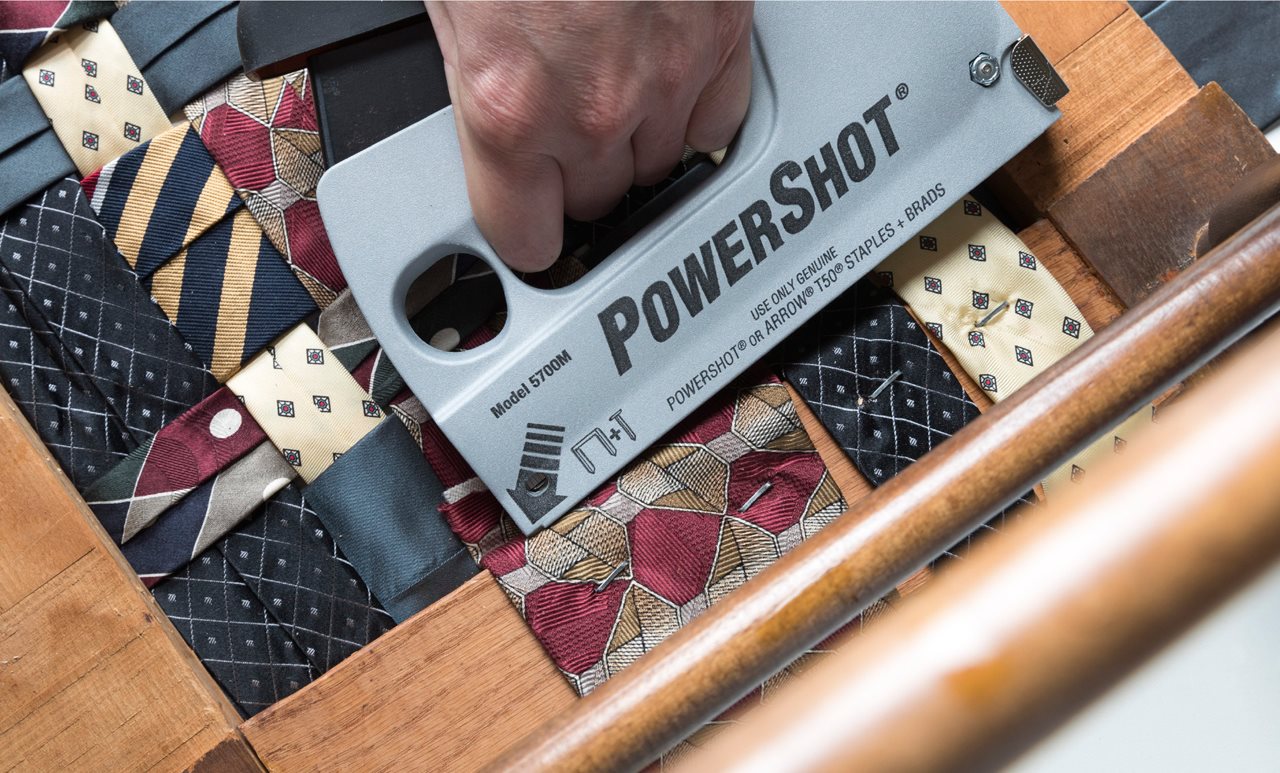
Place the seat of the chair upside down over the woven tie pattern and begin to staple the tie ends to the underside of the chair with the Powershot 5700 and Arrow 3/8” staples. You can pull the ties tight across the surface as you staple. Trim the excess material, leaving an inch or two to bend over and staple to the inside edge of the underside of the chair frame.
Step 4: Cut corners. … Yes, this time it’s OK
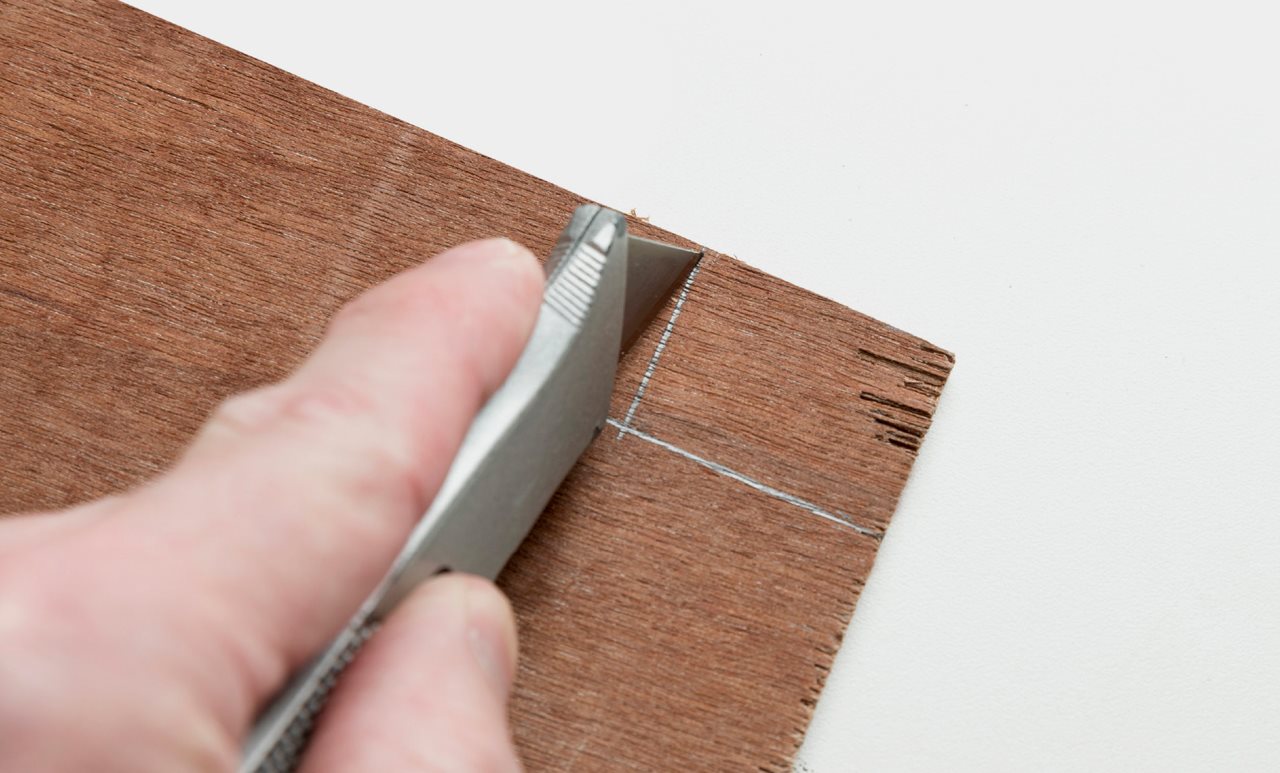
The corners of the plywood square support piece will need to be cut out to accommodate the four legs at the corners of the chair. With the chair upside down on a hard surface, place the plywood where it will be mounted. Use a pencil or marker and trace the leg corners. The plywood can be scored with a utility knife. However, you could also use a jigsaw. Remove from all four corners.
Step 5: Finish the foam
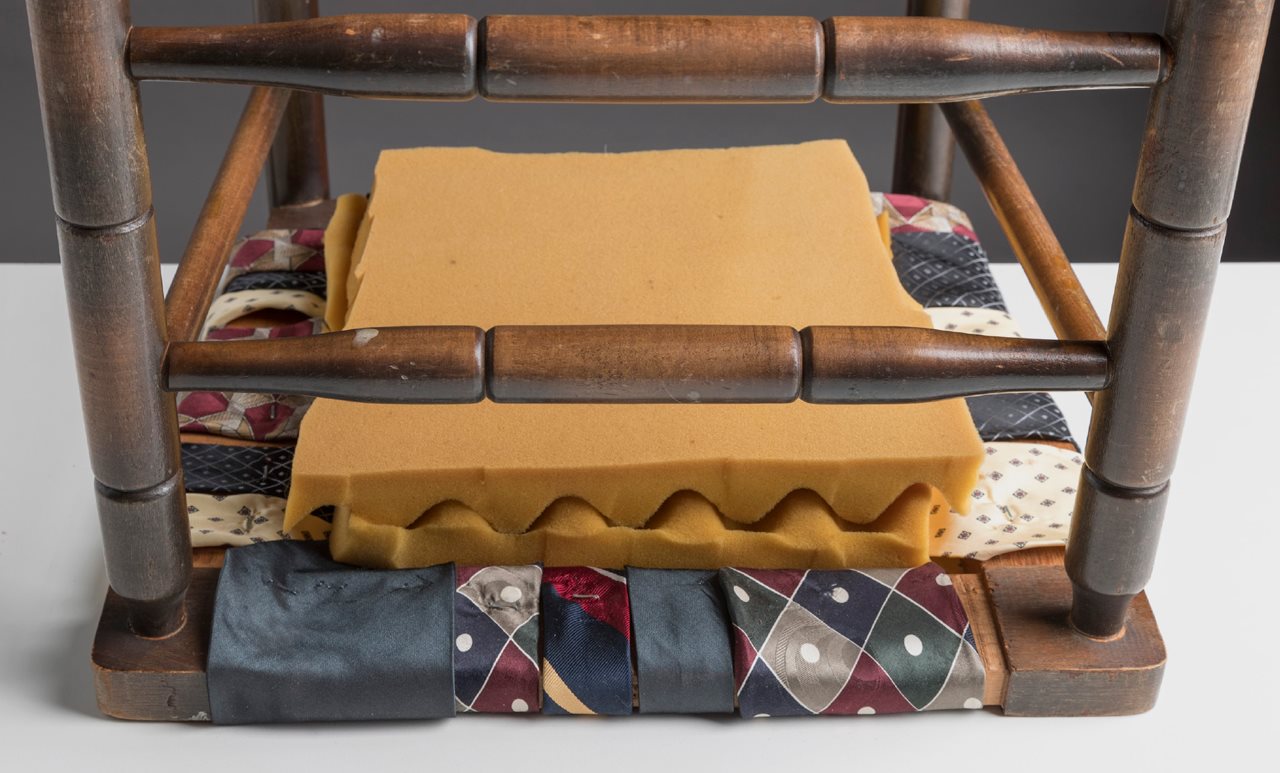
With the chair upside down on a hard surface, place the foam on top of the backside of the woven ties. The ties will stretch enough to accommodate the padding.
Step 6: Apply the plywood back
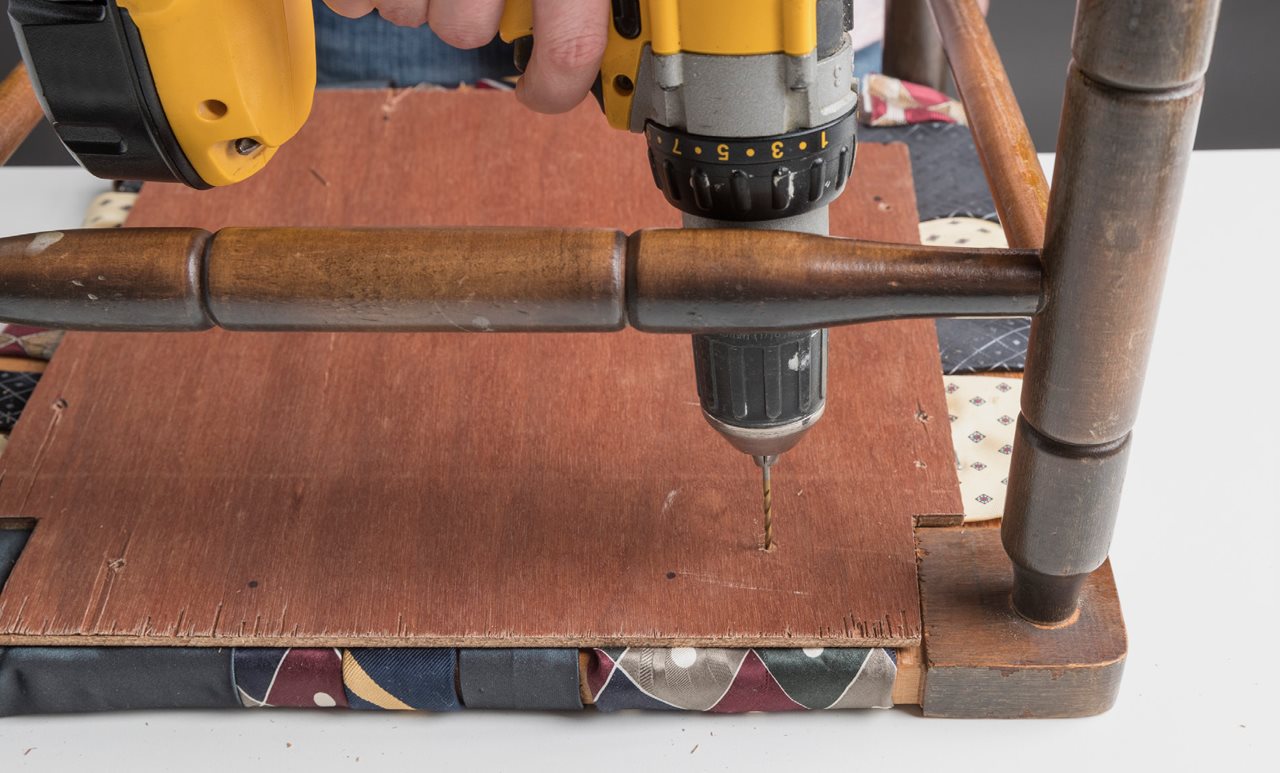
Place the notched plywood back over the padding and pre-drill holes (two to three per side) through the backing into the chair frame.
Step 7: The finishing touches
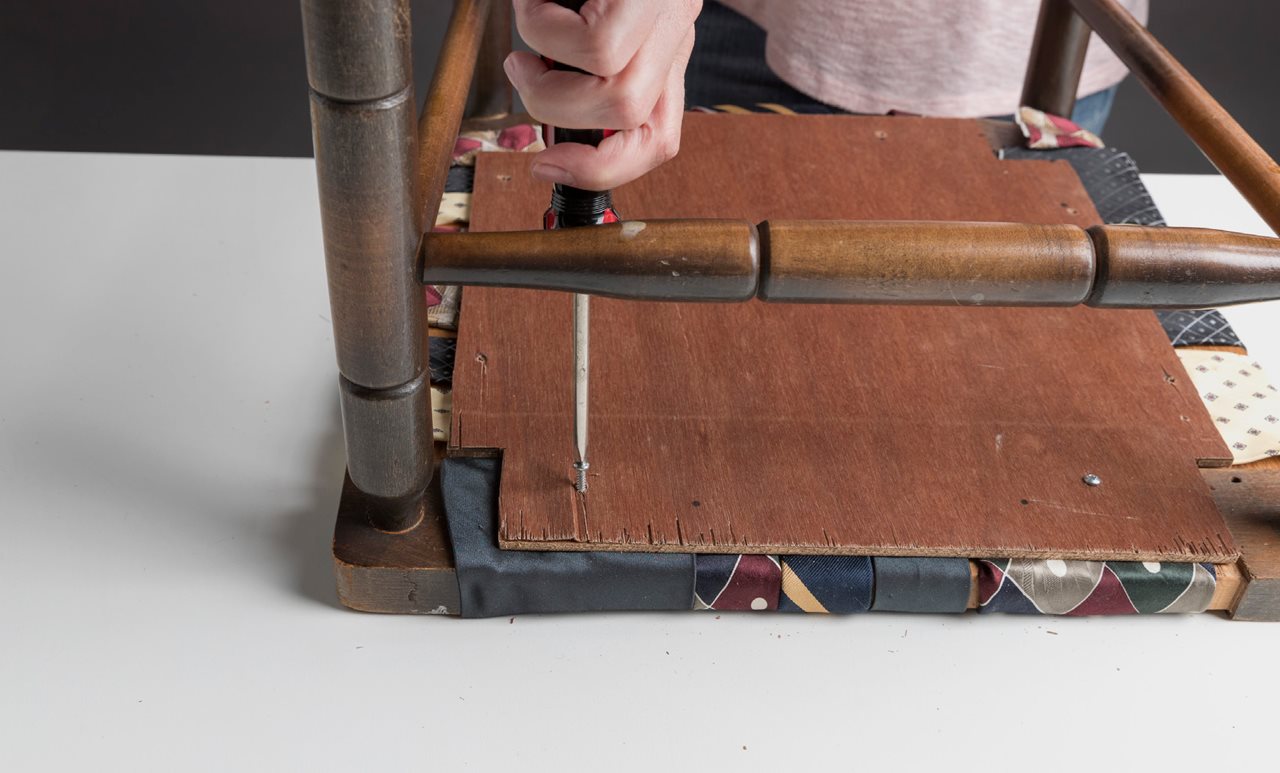
Secure the plywood backing with screws on every side of the underside of the chair frame.
Step 8: A little decoration
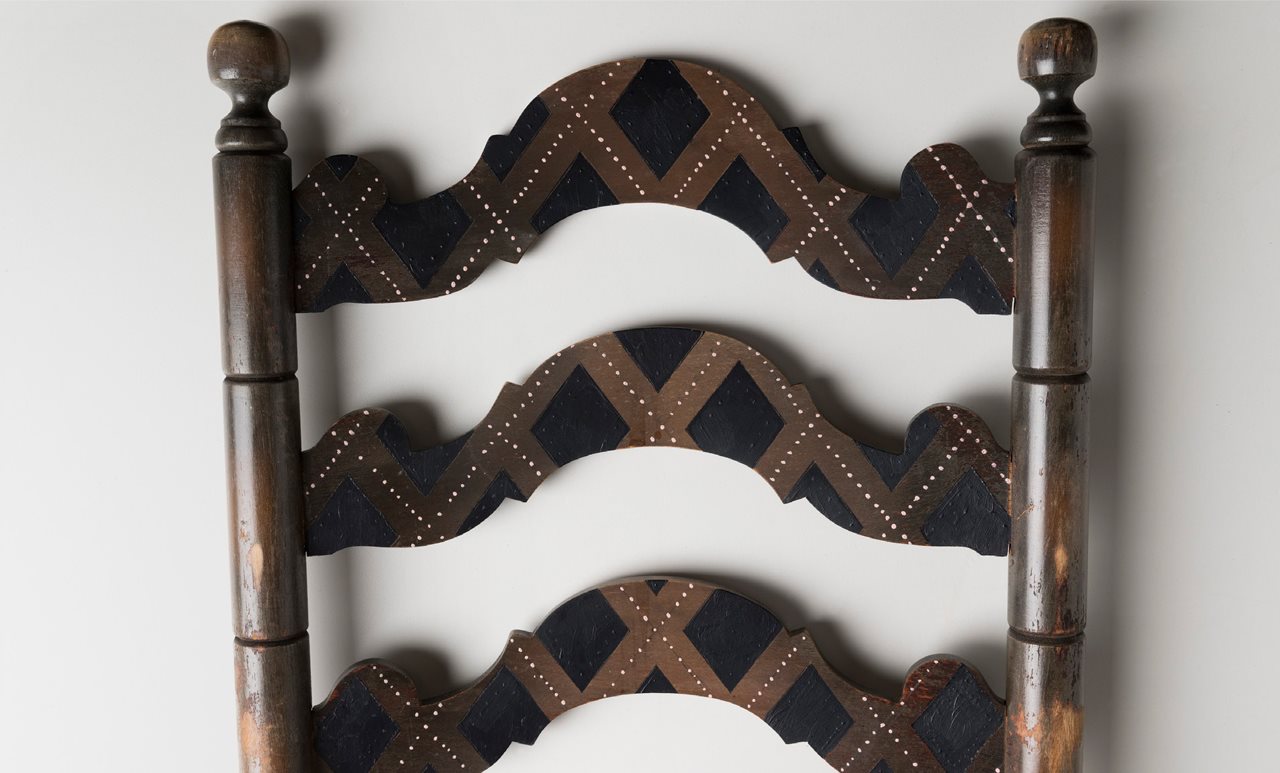
Turn the chair right side up and add some decorative touches as you choose. You can paint one of the tie patterns on the chair back and make some final adjustments to the woven patterns of the ties.
Next Step: Tackle the next project together
A well-rounded tool set can help you finish not only this cane chair but any other project you have on your list. Plan your next project — and pick up some practical gifts — by visiting www.arrowfastener.com or your local hardware store or home center for the tools you need to make it happen. With the right tools and the right project partner, there’s nothing you can’t do.